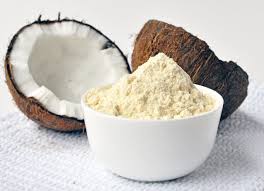
 In this article we’ll be talking about all of the glorious benefits of coconut flour. We’ll give you tons of information on nutritional values and facts. The pro’s of using coconut flour as opposed to other processed flour. Of course we’ll throw in a few recipes along the way for you to try and tell us about. So I hope you guys enjoy this edition of “All of The Benefits”, till next time stay healthy, stay fit and remain sleek!
Coconut flour is quickly becoming a growing trend as more people learn all about it’s benefits. Here are just a quick few things that you may or may not know about coconut flour. Coconut flour is gluten- free, high in fiber, protein and it’s also wheat and grain free! It has a light taste of coconut which is delicious on top of being healthy, so you won’t feel to bad when you bake with it. Another nutritional value that coconut flour has is that it’s filled with healthy fats, low in sugar, has digestible carbohydrates and calories, on top of being low on the glycemic index.
These things make it a favorite among gluten-free eaters including those with a sickness called Celiac Disease, gluten sensitivity, leaky gut syndrome, diabetics, vegetarians and those allergic to nuts. Coconut flour is very versatile and can be used in many recipes and causes very little to none digestion or autoimmune problems. So now let’s jump into some food facts about our fabulous coconut flour.
- One of the benefits is that it helps to give your metabolism a boost of energy due to the high levels of healthy saturated fats called MCFA(Medium Chain Fatty Acids).
- Coconut meat supplies 61% of dietary fiber, which is quite impressive. Fiber can’t be absorbed some of the calories and carbohydrates in coconut flour move right through the digestive track helping to get rid of toxins and waste.
- Being that coconut flour is a low glycemic food, it doesn’t cause spikes in blood sugar levels. Studies show that consuming coconut flour can help to lower overall glycemic impact and help maintain a stable blood sugar level. This is extremely important for those who have diabetes and are trying to reach or maintain a certain weight.
- Due to it’s high nutrient density it helps to keep the digestive system healthy and running smoothly. It also helps to lower bad cholesterol levels and serum triglycerides. All of these wonderful things due to it’s high supply of both soluble and insoluble dietary fiber and healthy fat content.
Coconut flour is made from ground and dried coconut meat. After the outer green husk is removed all that remains is the coconut meat. Coconut meat is the white, firm part of the coconut. But in order to make the flour you need to scrape the inside, separate the milk from the meat, then strained so it can be baked in order to dry and become this wonderful thing we know as coconut flour.
A serving of coconut flour is ¼ a cup which has
- 120 calories
- 4 grams of fat
- 4 grams of protein
- 10 grams of fiber
- 16 grams of carbohydrates
- 2 grams of sugar
Coconut Flour Banana Bread Recipe
Ingredients:
Dry Ingredients:
¾ cup coconut flour
½ tsp baking soda
1 tsp cinnamon
A dash or two of sea salt
¼ cup shredded coconut (plus a little extra to top the loaf)
Wet Ingredients:
3 pastured eggs
¼ cup apple sauce
⅓ cup coconut oil
1 tbsp vanilla extract
3 medium bananas (ripe)
⅓ cup raw honey
Directions:
Preheat the oven to 300F.
Lightly oil your bread pan. In addition to oiling the pan, I like to cut 2 strips of unbleached parchment paper and overlap them in a cross to cover the interior of the bread pan. This will help your bread lift out once it is baked.
Whisk together dry ingredients in a medium size bowl and set aside.
Mash the bananas in a small bowl. I use a potato masher.
In a small saucepan, melt the coconut oil on the stove top (and the honey if it is in a solid state).
Finally, mix together all ingredients including the ones that you have not yet touched and the ones that you have set aside. Mix until well incorporated.
Pour into the lined bread pan. Sprinkle extra shredded coconut over the loaf if you desire.
Bake for 1hr and 10 minutes. Remove from the oven insert a toothpick into the loaf. If it does not come out cleanly, return the bread to the over for another 10 minutes and check again. Continue until the toothpick removes cleanly.
*Baking Considerations
1. An old fashioned aluminum bread pan works best. The lighter the pan the better as dark pans absorb the heat and often burn the loaf. Glass pans, while light, are actually the worst. They act as an insulator and over cook the bread.
2. Over mixing, or mixing using beaters will create a dry and thick loaf.
3. The riper the bananas, the better the loaf will taste.
4. Preheat your oven for at least 15-20 minutes.